ProActive Quickstart - Resource Manager
The ProActive Resource Manager (RM) helps to deploy, administrate and monitor worker nodes. A worker node, also known as ProActive Node is a Java Virtual Machine process which can be launched on a variety of computing resources such as desktop computers, computer clusters or clouds. These worker nodes are used by the ProActive Scheduler to execute job tasks. It is also possible to launch multiple ProActive Nodes on the same host. It will allow the Scheduler to execute several job tasks in parallel on the host.
This tutorial will show you how to start ProActive Nodes, add them to the Resource Manager and monitor their states. We will show you different ways to perform each step, by using different tools such as the Web interface, the REST interface or command line.
Out of the box
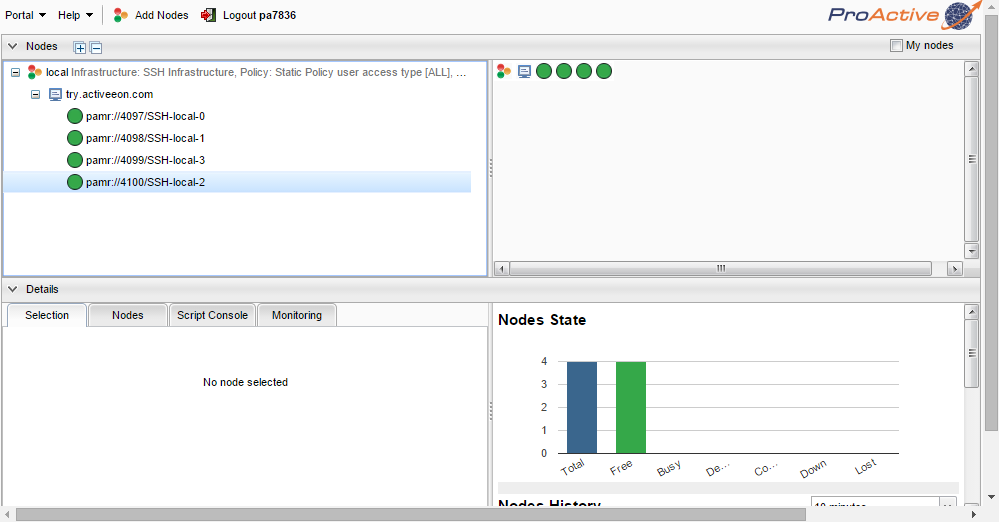
By default, the Scheduler is configured to launch a Resource Manager with 4 worker nodes, so that it can start to execute jobs immediately. These worker nodes are local, runs on the same host system as the Scheduler and Resource Manager
You can access an online version of the Resource Manager at: http://trydev.activeeon.com/rm.
1 Local Setup
Before you can create and add local ProActive Nodes to the Resource Manager, you will need to create a credential file. It provides a secure way to authenticate and authorise with the Resource Manager.
To create a credential file:
- Login here. Use the username and password you received by e-mail when you first signed up.
- On the Portal tab, click Create credentials.
- In the Create Credentials box, type Login and Password.
Click create.
Your credential file will start to download automatically. You will need this file for the rest of this tutorial.
To create and add more local ProActive Nodes:
- Login here. Use the username and password you received by e-mail when you first signed up.
- Click Add Node Source button
- Click on the Advanced configuration checkbox
- In the Create Node Source box, select LocaInfrastructure as the infrastructure and StaticPolicy as the policy
- The configuration fields for the Node Source will appear
- You have to provide the credentials that will be used, in the credentials box, click Choose Files and select the credential file.
- The nodeTimeout default should be increased to 60000.
- Type the maximum number of nodes in the maxNodes text box.
- For the Policy, the default settings are correct. They allow everyone to use it.
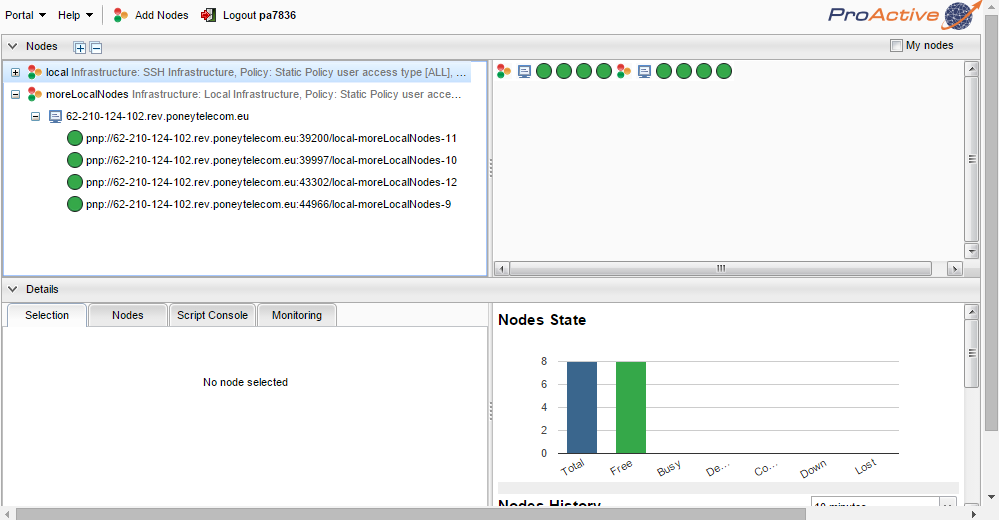
That's all! You will see more local ProActive Nodes are added to the Resource Manager
You can also create and add local ProActive Nodes by using the RM REST Interface. Below is an example of a commandset to create and add local ProActive Nodes by using the REST Interface with cURL. Make sure you replace the credentials with the one you generated by the RM Web Interface (see the RM Web Interface section).
# first we login and retrieve a session id
$ sessionid=$(curl -d "username=YOURLOGIN&password=YOURPASSWORD" https://trydev.activeeon.com/rest/rm/login)

# set credentials that you generated to 'creds' variable
$ creds=$(cat credentials.generated.by.webinterface)

# then we create and add local ProActive Nodes to the Resource Manager
$ curl -v -H "sessionid:$sessionid" -d "nodeSourceName=moreLocalNodes&infrastructureType=org.ow2.proactive.resourcemanager.nodesource.infrastructure.LocalInfrastructure&&infrastructureParameters=4&infrastructureParameters=30000&infrastructureParameters=" --data-urlencode "infrastructureFileParameters=$creds" -d "policyType=org.ow2.proactive.resourcemanager.nodesource.policy.StaticPolicy&policyParameters=ALL&policyParameters=ME" https://trydev.activeeon.com/rest/rm/nodesource/create
You will see 4 more local ProActive Nodes are added to the Resource Manager.
ProActive Resource Manager has command line clients, for both Linux and Windows platforms. They can be downloaded from ActiveEon Community Downloads page. To run Resource Manager command line clients, download the ProActiveScheduling archive, unzip it and follow the instructions below:
$> ./bin/proactive-client -k -u https://trydev.activeeon.com/rest -l YOUR_LOGIN
You can login using login command, then you can create and add local ProActive
Nodes using the createns command.
Note: On Windows, use backslashes in paths. I.e. "c:/Temp/tutu/¨
$> login('YOUR_LOGIN')
renewing session ...
password:*****
Session id successfully renewed.
$> createns( 'moreLocalNodes', ['org.ow2.proactive.resourcemanager.nodesource.infrastructure.LocalInfrastructure', 'path.to.your.credentials.file', 4, 60000, ''], ['org.ow2.proactive.resourcemanager.nodesource.policy.StaticPolicy','ALL','ALL'])
Node source successfully created.
You will see 4 more local ProActive Nodes are added to the Resource Manager.
2 Cluster Setup
Adding host machines of a cluster to the Resource Manager, typically involves unpacking the software on all those host machines. Then we need to determine which method that the Resource Manager can use to access the host machines in the cluster to launch the ProActive Node daemon.
The most common case in practice is the SSH access even though the Resource Manager can use other methods. (see the list of supported infrastructures in Create Node Sources box you get when you click on Add Node Source tab.)
You can use the RM Web Interface to add remote ProActive Nodes to the Resource Manager just like you saw in the previous step. You will also need to create a credential file. See the RM Web Interface section in the Local Setup to know how to create a credential file.
- Login here. Use the username and password you received by e-mail when you first signed up.
- Click Add Node Source tab.
- Click on the Advanced configuration checkbox.
- In the Create Node Source box, select SSHInfrastructure as the infrastructure and StaticPolicy as the policy
- The settings to be configured are the following:
- Download this host machine list file. This file indicates that the resource manager will create more nodes on the host localhost. In the hostList box, click Choose Files and select it.
- In the rmCredentialPath box, click Choose Files and select the credential file you created in step 1 Local Setup.
- Click OK.
You will see ProActive Nodes from the cluster are added to the Resource Manager.
You can also create and add remote ProActive Nodes by using the RM REST Interface. Below is an example of a commandset to create and add remote ProActive Nodes nodes by using the REST Interface with cURL. Make sure you replace the credentials with the one you generated by the RM Web Interface (see the RM Web Interface section in the Local Setup).
# first we login and retrieve a session id
$ sessionid=$(curl -d "username=YOURLOGIN&password=YOURPASSWORD" https://trydev.activeeon.com/rest/rm/login)

# set credentials that you generated to 'creds' variable
$ creds=$(cat credentials.generated.by.webinterface)

# then we define a node source
$ curl -v -H "sessionid:$sessionid" -d "nodeSourceName=sshRest&infrastructureType=org.ow2.proactive.resourcemanager.nodesource.infrastructure.SSHInfrastructure&infrastructureFileParameters=localhost 2&infrastructureParameters=60000&infrastructureParameters=1&infrastructureParameters=1000&infrastructureParameters=&infrastructureParameters=&infrastructureParameters=&infrastructureParameters=Linux&infrastructureParameters=" --data-urlencode "infrastructureFileParameters=$creds" -d "policyType=org.ow2.proactive.resourcemanager.nodesource.policy.StaticPolicy&policyParameters=ALL&policyParameters=ME" https://trydev.activeeon.com/rest/rm/nodesource

# and we deploy the node source
$ curl -v -X PUT -H "sessionid:$sessionid" -d "nodeSourceName=sshRest" https://trydev.activeeon.com/rest/rm/nodesource/deploy
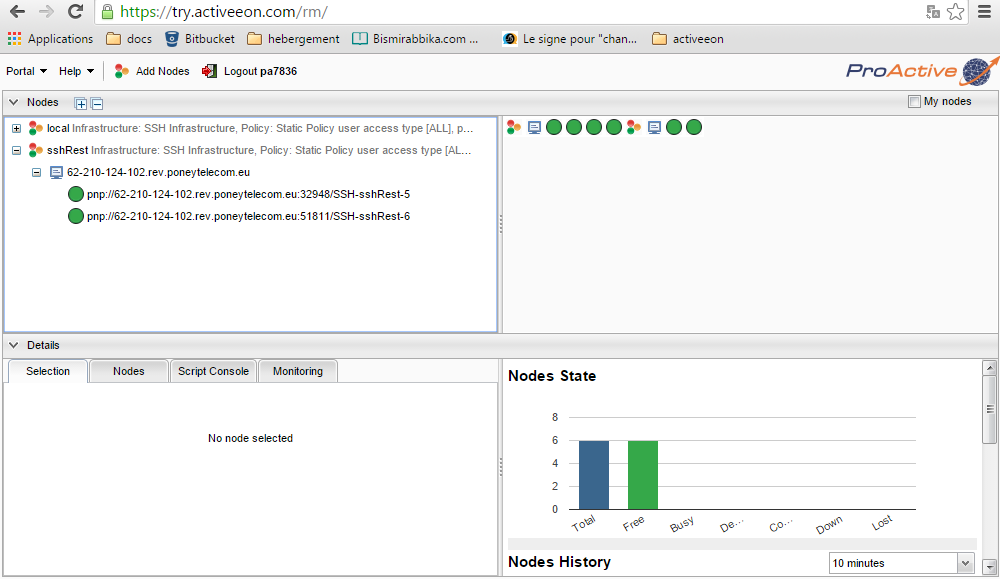
You will see more remote ProActive Nodes are added to the Resource Manager.
ProActive Resource Manager has command line clients, for both Linux and Windows platforms. They can be downloaded from ActiveEon Community Downloads page. To run Resource Manager command line clients, download the ProActiveScheduling archive, unzip it and follow the instructions below:
$> ./bin/proactive-client -k -u https://trydev.activeeon.com/rest -l YOUR_LOGINYou can login using login command, then you can create and add remote RM-Nodes using createns command. In this command, you should replace the file name cluster_setup_slaves with the path to your own file containing the number of nodes to deploy per host. Do not forget to replace also the path to your credentials file.
Note: On Windows, use backslashes in paths. I.e. "c:/Temp/tutu/¨
$> login('YOUR_LOGIN')
renewing session ...
password:*****
Session id successfully renewed.
$> definens( 'sshCli', ['org.ow2.proactive.resourcemanager.nodesource.infrastructure.SSHInfrastructure', 'cluster_setup_slaves', 60000, 1, 1000, '', '', '', 'Linux', '','path.to.your.credentials.file'],['org.ow2.proactive.resourcemanager.nodesource.policy.StaticPolicy','ALL','ALL'])
Node source successfully created.
$> deployns( 'sshCli')
Node source successfully deployed.
You will see more remote ProActive Nodes are added to the Resource Manager
3 Monitoring and Administration
The Web Interface of the Resource Manager is the easiest way to monitor its resources. In the following figure, you can see the list of nodes, their states, loads etc.
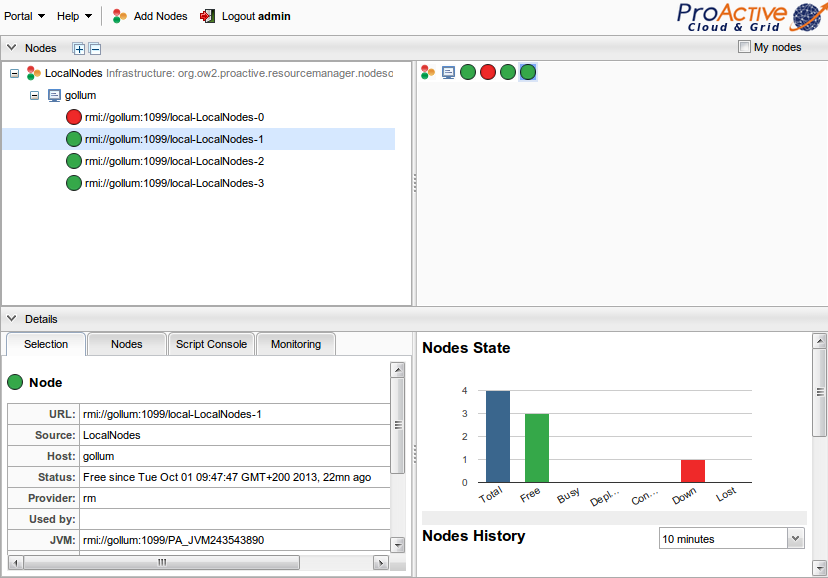
By selecting each host machine, you can check its various metrics
You can monitor the state and usage of the Resource Manager by using the RM REST Interface. Below is an example of a commandset to retrieve the state of the Resource Manager by using the REST Interface with cURL. This is useful for scripting.
# first we login and retrieve a session id
$> sessionid=$(curl -d "username=YOURLOGIN&password=YOURPASSWORD" https://trydev.activeeon.com/rest/rm/login)

# then we can retrieve usage statistics for the last 10 minutes
$> curl -H "sessionid:$sessionid" https://trydev.activeeon.com/rest/rm/stathistory?range=mmmmm
The reponse representing the RM state and its usage (JSON fromat):
{"BusyNodesCount":[0,0,0,0],"FreeNodesCount":[9,9,9,9],"DownNodesCount":[0,0,0,0],"AvailableNodesCount":[9,9,9,9],"AverageActivity":[0.012,0.011,0.011]}
To discover more check out the REST API documentation.
ProActive Resource Manager has command line clients, for both Linux and Windows platforms. They can be downloaded from ActiveEon Community Downloads page. To run Resource Manager command line clients, download the ProActiveScheduling server archive, unzip it and follow the instructions below:
ProActive also provides command line tools, they can be downloaded from the download section (ProActiveScheduling archive). Unzip the archive and follow the instructions below:
$> ./bin/proactive-client -k -u https://trydev.activeeon.com/rest -l YOUR_LOGIN
You can login using login command, then we can use the rmstats() and listns()
commands to get some informations about the node and infrastructure.
$> login('YOUR_LOGIN')
renewing session ...
password:*****
Session id successfully renewed.
$> rmstats()
         Stats:

         MaxBusyNodes               2
         MaxConfiguringNodes        2
         ToBeReleasedNodesCount     0
         DeployingNodesCount        0
         MaxDeployingNodes          4
         BusyNodesCount             0
         AvailableNodesCount        6
         MaxLostNodes               0
         MaxFreeNodes               6
         AverageInactivity          99.98063673996414
         Status                     STARTED
         LostNodesCount             0
         FreeNodesCount             6
         DownNodesCount             0
         AverageActivity            0.019363260017414292
         MaxDownNodes               0
         ConfiguringNodesCount      0
         MaxToBeReleasedNodes       0

$> listns()
         SOURCE_NAME     DESCRIPTION                                                                          ADMINISTRATOR

         local           Infrastructure: SSH Infrastructure, Policy: Static Policy user access type [...      rm
         sshCli          Infrastructure: SSH Infrastructure, Policy: Static Policy user access type [...      pa7836
You can use the help() command to list all available commands.